
Hundreds Of Free Knitting Patterns And So Much More |
Barbara Breiter's Knitting On The Net |
|
Learn To Knit
|
Zip Up The Back Hooded Baby SweaterKathy Roletter Gaynor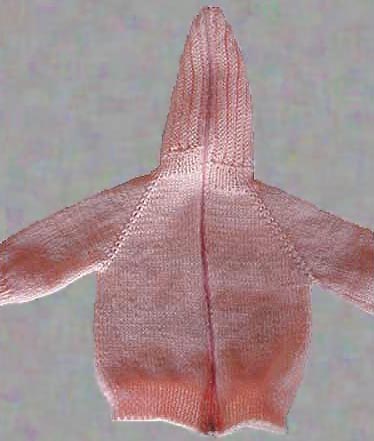 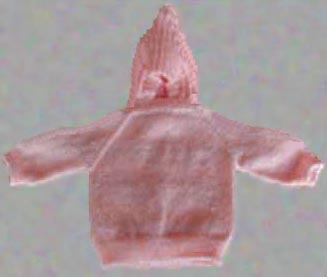 3 balls Paton's Look At Me baby sport 50 grams/152 yards Size 4 US (3.5 mm) circular 24" or longer for hood and body of sweater Size 2 US (2.75 mm) circular 24" or longer for body ribbing Size 4 US (3.5 mm) double points for sleeves Size 2 US (2.75 mm) double points for sleeve cuffs E-4 (3.5 mm) crochet hook Stitch markers Stitch holders Tapestry needle Regular zipper, 20" in color to match yarn Regular sewing thread in color to match yarn and needle to hand stitch zipper in place down the back (or use sewing machine) Size: Newborns Finished chest measurement=18" Gauge: 6 sts and 7½ rows = 1" in St st with larger needles 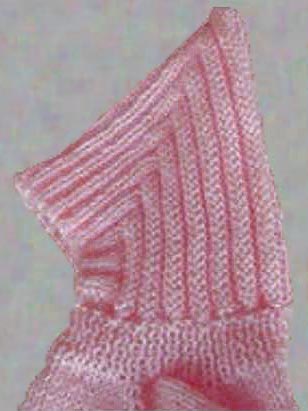 Optional Note: I slip the first st purlwise and purl the last st on every row throughout the whole sweater for a nice chain edge on each side. If you want to do this, the ribbing rows will be: Slip first st purlwise, K1, K2, P2 to last 2 sts, K1, P1. Hood With larger needles, CO 78 sts. Work K2, P2 ribbing for 7 rows. Row 8: K10, cont rib to last 10 sts, k10 Row 9: P10, cont rib to last 10 sts, p10 Row 10: Rep Row 8. Row 11: K12, cont rib to last 12 sts, k12 Row 12: P12, cont rib to last 12 sts, p12 Row 13: Rep Row 11. Row 14: K14, cont rib to last 14 sts, k14 Row 15: P14, cont rib to last 14 sts, p14 Row 16: Rep Row 14. Row 17: K16, cont rib to last 16 sts, k16 Row 18: P16, cont rib to last 16 sts, p16 Row 19: Rep Row 17. Cont as est, adding 2 more sts on both sides of center rib sts until center K2 (RS) rib sts rem. End with WS row completed. Hood should meas 7" from beg. BO loosely. Do not break yarn. Neck Ribbing Cont with same needles. You have one st rem on needle from binding off. Pick up 27 sts along right edge of hood, CO 8 new sts, pick up 28 sts along left edge of hood - 64 sts Knit one row to form a garter ridge at top of ribbing on right side of sweater. Work in K1, P1 ribbing for 8 rows, then K 2 rows to form a garter ridge at bottom of ribbing on right side of sweater. Neck ribbing should measure about 1¼" including garter ridges at top and bottom. Yoke Top of body and sleeves are worked in one piece. Row 1: K12, M1, place marker, M1, K8, M1, place marker, M1, K24, M1, place marker, M1, K8, M1, place marker, M1, K12 - 72 sts Row 2: Purl all sts, slipping markers. Row 3: K13, M1, slip marker, M1, K10, M1, slip marker, M1, K26, M1, slip marker, M1, K10, M1, slip marker, M1, K13 - 80 sts Row 4: Rep Row 2. Cont as est, inc one st before and after each marker (8 inc sts total on every knit row), until you have 54 sts in the front (middle) section of sweater yoke. You will have 184 sts in all distributed as follows: 27 sts for right back, 38 sts for right sleeve, 54 sts for front, 38 sts for left sleeve, 27 sts for left back. You have worked a total of 30 rows on the yoke. End with a purl row. Yoke should measure 3¾" from bottom of neck ribbing. Body Worked from armholes down to bottom cuff. Row 1: K27, remove marker, place 38 sleeve sts on stitch holder, remove marker, K54, remove marker, place 38 sts on stitch holder, remove marker, K27 - 108 sts. Be sure you pull the yarn tight across the gap where sleeve sts are taken off needle. Purl next row. Work even in St st until body of sweater measures 5" or desired length from armholes. Change to smaller needles and work in k1, p1 ribbing for 1½" for bottom. BO loosely. Do not break yarn. Insert crochet hook in last st and work a single crochet edge along the back edges of sweater where zipper will be inserted later. If desired, work a single crochet edge around face opening of hood for a neat finish. Sleeves Note: You can work sleeves back and forth and then seam later. Place sleeve sts on larger double point needles and divide evenly. Join (leave a good 12" tail of yarn at this point for closing up tiny holes when done) and work in St st until sleeve measures 4" (or desired length) from armhole. Change to smaller double point needles and work in K1, P1 ribbing for 1". BO loosely. Finishing Weave in ends of yarn on WS. Close up tiny holes where the sleeves and body meet, then weave in ends. With sewing thread and sewing needle (or sewing machine), sew in zipper down back with zipper opening at bottom ribbing of body. See Abbreviations and the Glossary for help. |