Hundreds Of Free Knitting Patterns And So Much More |
Barbara Breiter's Knitting On The Net |
|
Learn To Knit
|
Beginner Socks Knitting PatternDesigned by Kim Goddard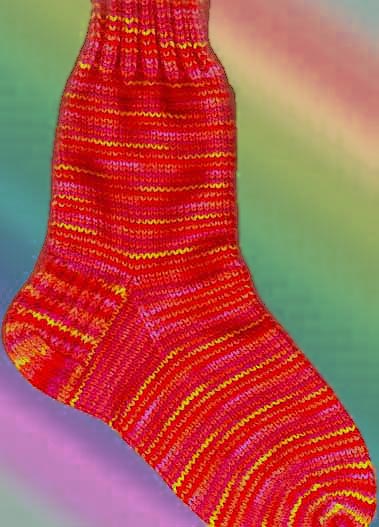 100 grams sock yarn of your choice Have some contrast colour yarn handy for the toes if you are making socks for a long foot, or if you want to extend the cuff length. Size 2 to 3 US (3 mm) double pointed needles Gauge: 28 sts= 4 inches Instructions CO 56 sts. Join and mark beg of round. Rib in K2, P2 rib for 7 inches or desired leg length. Divide For Heel Put one half of the stitches (28), centered on the beginning of the round, on a needle. (The easiest way to do this is to knit the first 14 sts, then turn and slip the 14 sts on the other side of the marker onto the needle). Place the other half on a holder - these stitches will be the instep later on. Work the heel flap over the 28 sts (using contrast colour if desired): P across the back of the heel flap, slipping the first stitch. Turn. Sl1, K1 across. Turn. Repeat these 2 rows till you have worked 28 rows (count the slipped stitches which should be 14). Turning The Heel You are making short rows to shape a little cup for the heel. Starting on the right side, knit halfway across the heel flap (14 sts) plus 2 (16). Sl1, K1, psso. K1. Turn. Sl1, P5, P2tog, P1. Turn. Sl1, K across to the gap (where you turned), slip the first stitch before the gap, K the stitch on the other side, psso, K1. Turn again. Sl1, P across to the gap. P2tog across the gap. P1. Turn. Continue in this manner until all the heel flap stitches have been used up. Join the first colour back in if you made a contrasting heel. Now you will be picking up the stitches on the sides of the heel flap and knitting around the sock again. Those stitches you put aside before doing the heel flap have waited patiently and will be put back into use! By slipping the first stitch of each row on the heel flap, you have made a lovely chain edge which will be easy to pick up. You should be able to get 14 stitches on each side, but don't worry if you get more or less than this. I usually pick up the stitches on one needle and knit them onto another, twisting them by knitting into the back of the loop. Knit across those patient instep stitches, or continue them in ribbing, then pick up and knit the same number of stitches on the other side of the heel flap. Knit one half of the heel flap stitches (8 or 9) onto this needle. Mark the centre as the beginning of the round. You now have three needles with rather a lot of stitches on them - one for each side of the gusset and one for the instep. If you have a spare needle in about the same size you can put the instep stitches on two needles instead - I find this is much easier to work. Now you want to make a row of decreases on each side of the heel flap to get back to the same number of stitches you began with (56). Knit to 3 sts from the end of needle 1, K2tog, K1. Rib across the instep sts. On needles 3 and 4, K first st, Sl1, K1, psso. Knit to end. K next round plain (ribbing the instep if desired). Repeat decrease round every other round until you have 56 sts again. Continue with knit sole and ribbed instep (just follow the established rib) until the foot measures 2½" less than your foot length. I use my 7" double points to give me a rough idea of when to begin the toe shaping, since my foot is 9½" long. Shape Toe: Join contrast colour if using such. Knit one round plain. Decrease round: K to 3 sts from end of first needle, K2tog, K1. K first st on instep needle, Sl1, psso, knit to 3 sts from end of instep needle (or end of needle 3 if you split the instep sts), K2tog, K1. Last needle, K1, Sl1, psso, K to end. Knit one round plain. Continue alternating plain and decrease rounds until you have half the number of sts you began with (28, or 7 on each of 4 needles). Then decrease on every round until you have 12 sts left all together. Cut off the yarn leaving an 18" tail. Thread a needle with this yarn tail and graft these sts together using the Kitchener stitch or just thread the end through all the sts and draw them up tightly. Weave the end of the yarn into the back of the stitches (turn the sock inside out). Weave in all your yarn ends, making sure to leave no knots. Knots in a sock will give you nasty blisters! There, you've made a sock! Welcome to the new addiction... Now you can make the mate. Handmade socks don't always match. If you want to, you can create a wardrobe of single unmatched but coordinating socks and wear a different pair every time! See Abbreviations and the Glossary for help. |