Hundreds Of Free Knitting Patterns And So Much More |
Barbara Breiter's Knitting On The Net |
|
Learn To Knit
|
Not For Skinny Legs SocksDesigned by Sande Francis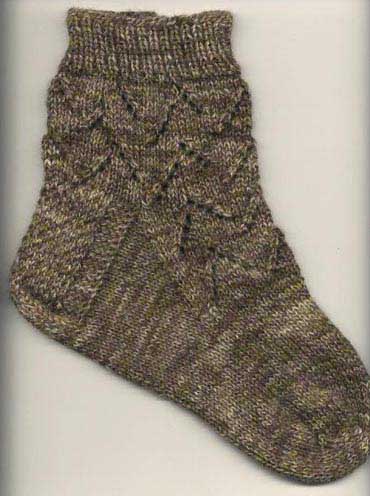 I made these socks with 2 strands of Froehlich-Wolle Special Blauband. I needed 3 50gram balls to fit me; you may use less if your feet aren't as long as mine. size 3 US/3.25mm 5" DP needles size 4 US straight needles Gauge: 6 st per inch Instructions: Using a straight needle in size US 4, cast on 61 sts in Twisted German Cast On. Slip the sts onto your DP needles, putting 16 on the first, 15 sts on the others. Make your circle and slip that last cast on st onto your first needle next to the very first st you cast on. Using the TAIL of the yarn (not the part that goes to the ball) K2tog tbl. K1tbl with the "real" yarn and then K1tbl with the tail again. Now Ktbl the rest of the round using the "real" yarn. This is how I make an unnoticeable join at the beginning of my socks. I discovered that the Twisted German cast on leaves the sts on the needles so they are awkward to knit "correctly" and solved the problem by purposely knitting thru the back loop. This continues the decorative look of the cast on for another round and does not hinder the stretch of the ribbing in any manner. Rib in K1P1 for about as long as I can stand it (12 rows) twisting only the P sts by purling through the back. It also manages to look better than normal ribbing when it's stretched around my leg. And it just happens to be my favorite way of lazy-bones ribbing - I don't much care to knit ribbing and this is about the only way I'll do any. This only makes about 1-1/2" of ribbing. You can do more if you are so inclined. On to the easy lace pattern. Here is a chart:  Slip that first st and work across in the honeycomb pattern until you have 11 sts remaining. SSK, turn, slip 1. Purl back across until you get to the stitch before the "gap," P2tog, turn, slip 1. Work back across in the honeycomb st until you get to the st before the gap on this edge, SSK, turn and slip 1. Continue in this manner until all the edge sts are eaten up - after you do the last SSK you should have 10 sts on the needle and be ready to pick up the sts for the first side of the gusset. I picked up 19 sts down the heel flap, and then I put the made stitch from the corner onto the gusset needle rather than leaving it on the instep needle where it would interfere with the lace pattern. Knit across the 30 instep sts in lace pattern (this should be row 1). Put the made st for the 2nd side of the heel flap onto that gusset needle rather than on the instep needle. K 1 round plain. Continue the lace pattern and gusset decreases at the same time until you have decreased back to 60 sts around. I usually make the foot of my socks narrower than the leg so they fit better. For this sock, I decreased down to 48 sts for the foot by decreasing 2 extra sts on each side of the gusset and decreasing 10 sts on the lace section. After I got to 60 sts around, I did the lace pattern decreases without the YOs next to them. This kept the look of the pattern while eating up stitches I didn't want. Once you get down to either 48 sts or the number of sts you like for your foot, continue knitting plain until the sock reaches the bottom of your large toe. I used a wide toe in this sock. It's like a wedge toe, but the shaping is done on the 3rd and 4th sts from the ends of the needles, not the 2nd and 3rd. I start my shaping on needle #2, a practice that allows me to finish up my decreases with the yarn end at the side of the sock instead of in the middle. This eliminates that last ½ row of knitting to get the yarn end into position to start weaving the toe closed. The wide toe is shaped thusly: Round 1 - work plain on needle #1. On needle #2, K2, SSK, k to end of needle. Needle #3, K to 4 sts from end, K2tog, K2. Needle #4, K2, SSK, k to end of needle. Needle #1, K to 4 sts from end, K2tog, K2. Round 2 - knit even around. Continue these 2 rounds until you reach 24 sts total (or the number you prefer for your toes). Leave about an 8" end, cut yarn and weave toe sts together. See Abbreviations and the Glossary for help. |